I’ve been fussing with this digital potentiometer, the DS1803 by Maxim. They’re “digital” because you can control the resistance over its range programmatically, by sending it commands over a 2-Wire (I2C/TWI) serial interface. So, that means that I can hook it up to some microcontroller, like the Arduino, and adjust the resistance in a little program. I chose this one in particular because it can operate at either 3V or 5V, which is convenient, and it comes in a few different models with various resistance ranges. I’m using the DS1803-010, which means it has a range of 0-10K Ohms.
I created a little PCB with two DS1803s on it. Each DS1803 has two potentiometers on it, so I’ve got four on this board. The code for controlling the DS1803 is pretty straightforward. Each one is addressable over the 2-Wire interface, but because we have two on the same interface, I had to configure one to listen to a slightly different address. The details are in the specification sheet, but basically you hardwire the three lines A0, A1, A2 (see the schematic above) to change the address. Effectively you can have up to 8 individually addressable DS1803s on one interface.
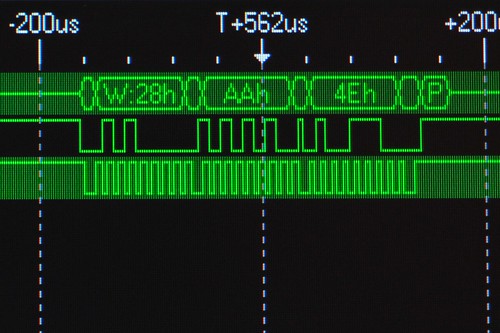
In the Arduino source code example below I am only talking with one DS1803 at address 0x28. (if I was talking to to the second one in the schematic, its address was 0x29.) Here I’ve hooked up a logic analyzer to the interface to just make sure we’re communicating. The code below simply adjusts the potentiometer incrementally upward.
[ad#ad-4]
//
// Control the DS1803 Digital Potentiometer

#include <Wire.h>

void setup()
{
  Wire.begin(); // join i2c bus (address optional for master)
}

byte val = 0;

void loop()
{
  Wire.beginTransmission(0x28); // transmit to device 0x28)
  Wire.send(0xAA);            // sends instruction byte,
                               // write to potentiometer-0
  Wire.send(val);             // sends potentiometer value byte
  Wire.endTransmission();     // stop transmitting

  val++;        // increment value
  if(val == 150) // if reached 64th position (max)
  {
    val = 0;    // start over from lowest value
  }
  delay(100);
}
