Persistent nagging problem — shifting logic levels between devices that are fabbed with different technologies so their voltages end up being different. Digital circuits “trigger” based on voltage levels — a logic 1 or high signal is relative to the electrical specifications of the device and the fabrication process of the silicon. (A techie diagram is available here.) It’s not a new problem, but one I seem to be coming across more and more as I use the Arduino to do quick sketches of project ideas, or to stand-in for a more embedded solution that might use another of the Atmel 8-bit devices later on when the design and details are more refined.
I’ve tried a bunch of things, including the kind of canonical reference circuit from Philips that uses the BSN20 MOSFET. Sparkfun has a neat little breakout board using a MOSFET, the BSS138. Same principle, built out for you by the fine folk at Sparkfun.
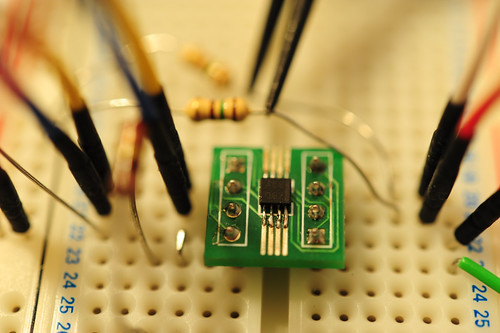
While poking around some more what cause of this PSX project where I have an Arduino trying to talk to a Parallax Propeller, I found reference to a single-chip solution from TI that’s called a PCA9306, which is that small guy up in the photos above. (Just a hair smaller than an 8-pin SSOP package, which means that it was too small to fit on this SSOP break-out — the pins don’t reach the copper, so I had Igor do some hand work to get that to take hold.
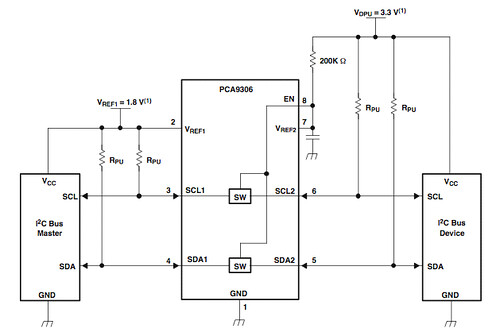
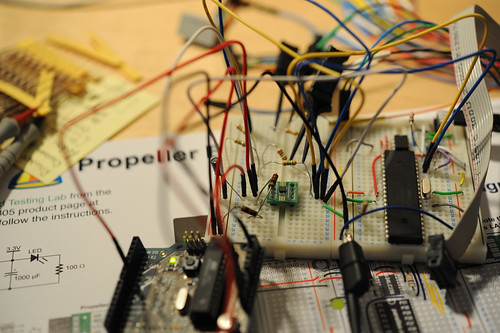
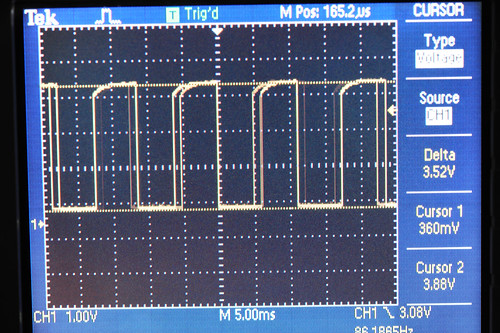
Looks like it works fine. It only requires four pull-up resistors to manage current sink, and a current limiting resistor for the enable input, as well as the usual power decoupling capacitor. I did a quickie test, not quite using the right values for the pull-ups, so with that allowance, I pretty much got the bidirectional level translation I’ll need to allow a 5 volt Arduino talk to the 3.3v Propeller.
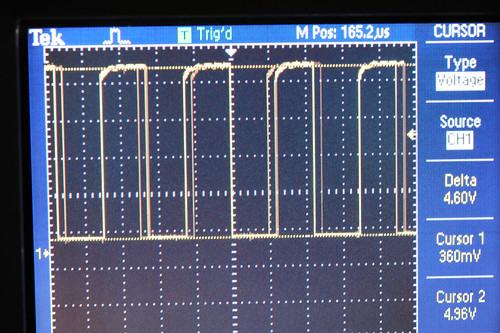
Here it is. Top trace is the SCl from the Arduino, bottom is 3.5v going into the Propeller. The 3.5v is a bit high, mostly because of the wrong values for the pull-ups on that side, and the fact that the Propeller is basically inert and not sourcing current across the resistor voltage drop. (I didn’t load my code onto the Propeller for this quick test.)
this question is totally unrelated to your post, but do you mind if I ask you where you got those jumper wires? Actually what I’d like to know is what crimp pins / sockets you use, I currently make my own jumper wires using molex c-grid crimps but they aren’t perfect.. thanks
Yeah, sure. It’s completely over-priced stuff that I get from Jameco. Way over-priced. I’m thinking of going direct to the wholesaler and just getting a whole bunch..
Do you know who the wholesaler / manufacturer is, or even better which crimp terminals they use? Crimping your own jumper wires should be the cheapest option. And if you make your own then you can make them in custom lengths and colors, which is the primary reason I’m looking into this. The problem is to find out where you can buy these terminals in reasonably small quantities, there are a lot of different terminals out there and I’m having some trouble finding the right ones…
Sure, the place appears to be K&H Products or K&H Manufacturing, based in Taiwan. Their URL is http://www.kandh.com.tw/. I’ve never ordered from them, and only reluctantly from Jameco, but every so often I think of getting a whole bunch of these direct. They’re handy in workshops and such all.
As for tools to make your own, I’ve also looked into crimp kits and the like, but have never pursued it beyond thinking about it..seems a little tedious for my sensibilities. The only reason I like these particular ones is they seem to be using stranded wire with rigid posts, so you can actually bend the wires easily over things, or connect them to things not on your breadboard, as opposed to the usual breadboard style rigid jumpers, which look nicer.