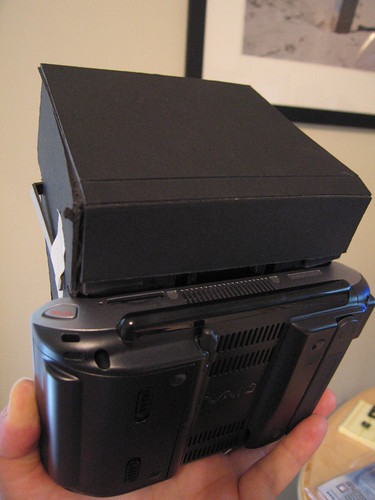
I spent a week or so wrangling some variations on the immersive viewer apparatus for the little research group at USC working on this project. Some of the “early” prototyping of the concept I had done last winter, described in this blog post.
Taking a hint from Mark Bolas to try some design prototyping with foam core and an Xacto knife, I figured I’d try some ideas out. I have to say, that after mostly thinking, writing and wrangling groups of people for conference, symposium and workshops, doing some tangible sort or craft work was incredibly satisfying. It was really nice to be in a situation where I was generating sawdust and sparks.
I managed to get a hold of one of the new Sony UX-180 UMPC form-factor devices (Windows XP, Core Solo 1.2GHz, 512MB RAM) an overpriced fetish device that, despite the cost, was perfect for this particular prototyping exercise. If an immersive viewer were to be as normal as an iPod this might be about the form-factor, i would guess. The unit is approximately the size of an unfolded Nintendo DS, and definitely heavier. The display is somewhere between good and excellent, imho, and despite the small size, the resolution of the screen only presents small challenges for reading text.
The goal of this little design and coding experiment was to create a reasonably self-contained viewer prototype that would allow form-factor and handling tests, figure out what optics configurations work (lenses, image size, etc.), have a platform for testing the omnistereo QuicktimeVR imagery and test software designs on this particular platform.
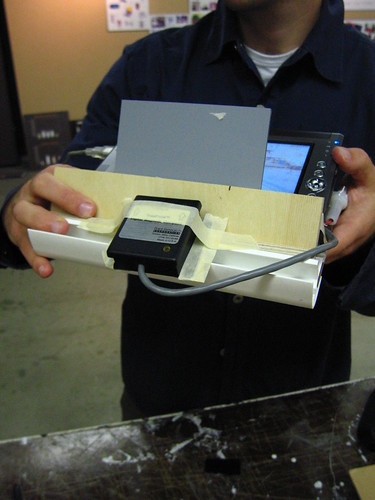
The “Configuration A” prototype used a huge TabletPC and a simple reflecting mirror system, together with a beautifully designed and humongous custom designed enclosure by the masterful Sean Thomas, a grad student at Art Center College of Design. The general idea was to orient the screen horizontally and use a mirror to increase the optical distance between one’s eyeballs and the screen by reflecting light. I was also guessing that it would be easier to hold the whole apparatus as if one were getting ready to take a bite out of a giant deli sandwich. Holding the apparatus out with one’s arms extended, quickly became tiring.
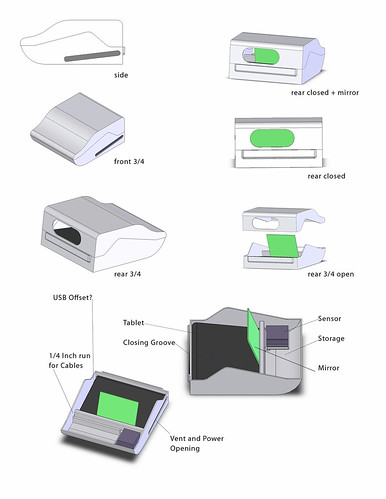
Second meeting at Art Center with Sean Thomas and Jed Berk to go over the first breadboard version Sean created. Placement of the sensor is an issue — it is sensitive to metal and EM fields generated by the TabletPC. We experimented with a few placement options, including in front, below in various places. Sean had the idea of a cut-out in the breadboard so that the sensor could go below, without sticking way out in the bottom. We foudn that th ebest placement for the time being seemed to be in the front, in front of the mirror. Sean showed me some of the 3D printing materials. We settled on this plaster material, which is more fragile than ABS, and cheaper. It seemed robust enough for a first version housing. Showed a few students who happened to be in the studio the app and they all thought it was very cool, so that’s, like..cool.
Sean had the difficult challenge of making something that would fit both a large TabletPC while still being well-designed enough to be somewhat hand-held and suitable for demonstrating the conceptual underpinnings of the project. He ulimately came up with a design that, I was told, was the biggest thing to come out of the Art Center’s 3D printer. I don’t know if that’s good or bad..
This “Configuration A” prototype was a great learning experience. Things like realizing that everything in the display is now backwards was a great part of the prototyping/learning experience. Realizing that I needed to find an expedient way to eliminate the wires that connected the sensor hardware to the computer was a great part of the prototyping/learning experience. Discovering that the Max/MSP patch I was using to broker the signals from the sensor to QuicktimeVR actually turned the QuicktimeVR in the “wrong” directin was a great part of the prototyping/learning experience.
So, “Configuration A” was an unqualified success in these regards. Definitely something that I could learn from and improve. Alas, I filed it away for several months an put the project on a semi-hold.
Then I started working on “Configuration B”, with a much smaller and much more powerful CPU, at least on paper — the Sony UX-180.
With more time this summer to work on the prototype, I decided I wanted to get rid of Max/MSP as the software “middleware” and code something from scratch. I felt I wanted to get closer to a solution that was as close to the operating system as possible, to maximize efficiencies and all the rest.
A quick test indicated that there was sufficient support within Windows .NET framework for QuicktimeVR to do what I wanted to do, and, from the specs, the UX-180’s graphics chipset was actually more robust than that on the TabletPC I had been using. Technically, it should work well, but it wasn’t until I got the UX-180 that I’d know. Of course, I delicately unpacked the unit in case I decided to return it.
With a little test app, attempting to simultaneously render two QuicktimeVRs (left eye and right eye for the ultimate goal of stereoscopy), I found out that the little UX-180 was up to the task.
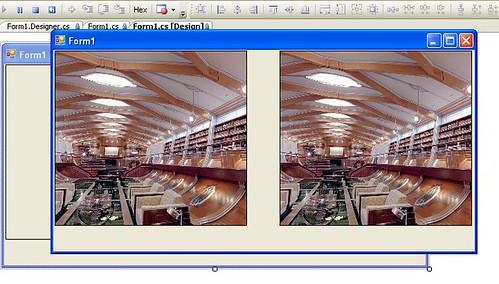
I patched in some RS232 serial protocol code to link together the sensor and the QuicktimeVRs, so that the sensor would provide the viewing point-of-view angle and booted it up on the UX-180. Although the device would render the QuicktimeVRs without any problem, I quickly found out that the UX-180, strangely, completely balked at reading the serial data with any reasonable speed. The machine literally ground to a halt, the mouse staggered and the fan spun up like a turbine. WTF? Render two video windows with no problem, but as soon as you have a little threaded serial port data reader, reading 12 bytes at a clip, the machine stalls? How disheartening. At first I thought it was my code, but even running some very simple tests straight from some trivial design patterns caused the same problem. I have been using Johan Franson’s amazing Serial Tools kit from franson.biz for years, and it was hard to believe this was the culprit. But, I went native just to eliminate the possibility and wrote my own serial port reader using the built-in .NET APIs. It worked much better, but I don’t blame Serial Tools and here’s why: everything runs fine on multiple desktop machines and the TabletPC. It’s only when the code attempts to run on the UX-180 that there are problems, leading me to believe that there is some particular weirdness on the UX-180 that causes the Serial Tools code to gum up.
So long as I could get the code to run, even using the slightly less elegant .NET “native” serial port API, I was happy. Now it was on to some physical prototyping.
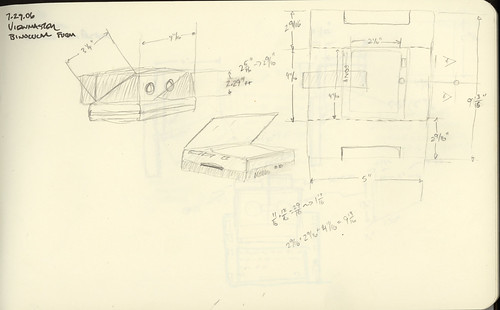
I guess I had the “binocular” form factor stuck in my head from the original Sean Thomas prototype. I just immediately started creating a similar configuration from cardboard and went to my local glazer and had a bunch of tiny mirrors cut.
My general goal for the Binocular Form Factor was as you see below. I got fairly well into it, but once I clamped it to the UX-180 just to see how it felt, a few problems arose. First, the UX-180 had to be oriented such that the “top” of the screen (as one would view it if you were holding the device conventionally), had to be towards your face because the mirror reverses everything. No biggie, except that there is a fan there (there’s also one on the bottom, but much less significant) that seems to be the busiest of them all. Not huge, but with your chin essentially abutting it, the heat is uncomfortable, to put it mildly. I thought of putting a small deflector baffle there, but quickly the whole design seemed destined to be awkward and embarrassing.
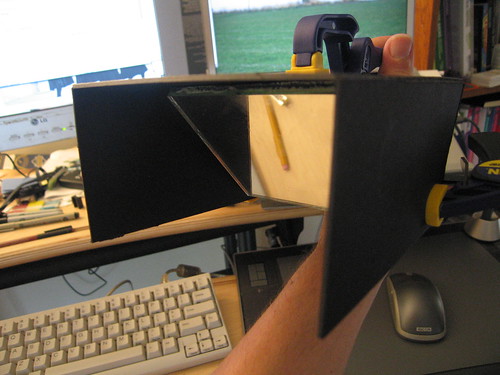
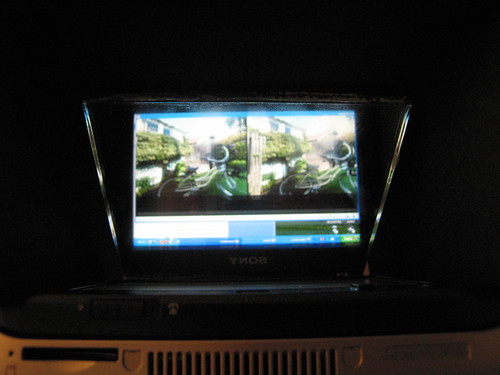
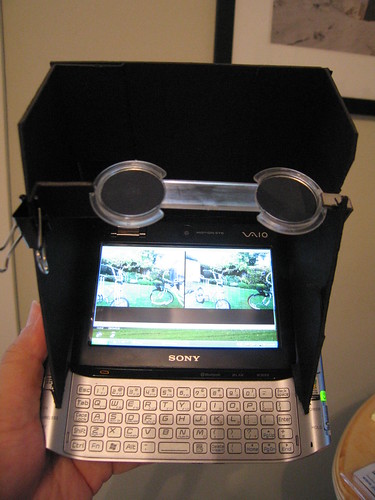
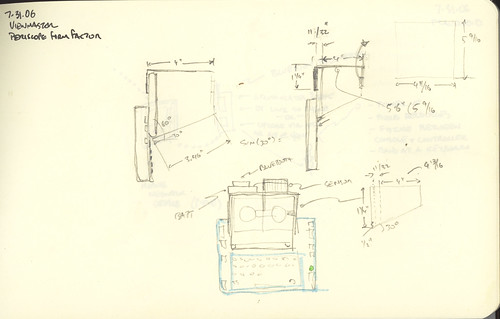
One of the problems of working alone in the back shed is that you don’t get collegial feedback and dialogue. It’s okay — that was just the circumstances of working during summer break. But had I been around others, we may have come up with an alternative — the one that struck me while I was riding my bike somewhere — what about a “periscope” style design? The UX-180 has this slide-up/slid-down screen which would make such an architecture suitable for that configuration, while also providing access to the keyboard. (One of the considerations I had was how to control various “meta” features of the viewer — switching slides, etc. Keyboard buttons and soft-switches are perfect for this.)
I sketched this out and then got busy with the Xacto..
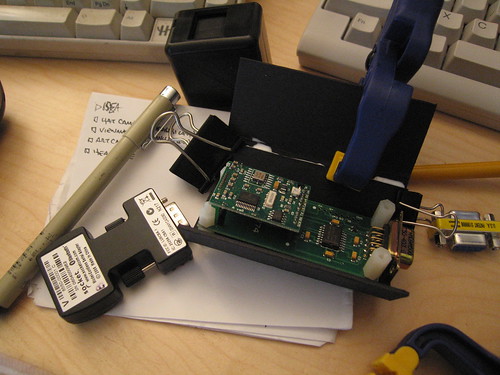
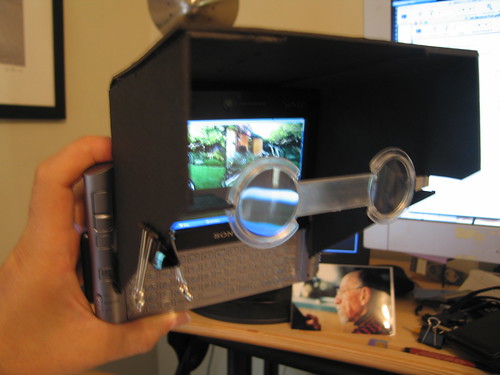
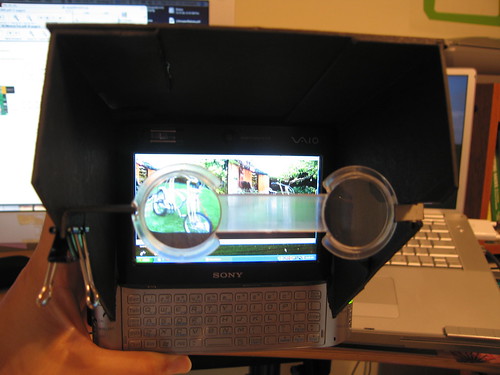
In these images you can see a design that’s much more accommodating to the general flavor of the viewer. I got a small selection of lenses designed for stereoscopy from 3D Stereo and tossed them in there, spent an evening sprucing up the viewer software, put in a simple Bluetooth-to-Serial dongle to avoid having to run a clunky USB cable into the UX-180, and processed a bunch of test 3D panoramas, turning them into QuicktimeVRs and gave it all a whirl.
The whole configuration works much better than I would’ve expected from a second prototype. I configured the soft-key “zoom-in/zoom-out” buttons on the UX-180 to move forward and backward through a directory of QuicktimeVRs. The directory either contains stereo pairs named “Right_XYZ” and “Left_XYZ” so the system knows which one’s to pair together. (Note to self: remember that the naming scheme also contains numerics indicating the size of the slit width and the distance — left or right – from the image center line that the slits are taken from so I can recollect how the image was processed and what configuration of these parameters work best to deliver decent stereo acuity.) The software consistently breaks the first time it starts up (but doesn’t after that first time), which I think means that I should not manually connect the device to the sensor before starting the software. Switching from the 3D panoramas to conventional QuicktimeVR panoramas works well in software, but, obviously, a different set of optics need to be moved in place in order to see non-stereo, non-3D renderings.
Resources
Summer Laboratory Experiment: Producing Stereo QuicktimeVRs
Consumer Immersive Viewer
Thanks
Sean Thomas
Michael Naimark
Jed Berk
Art Center Model Shop
