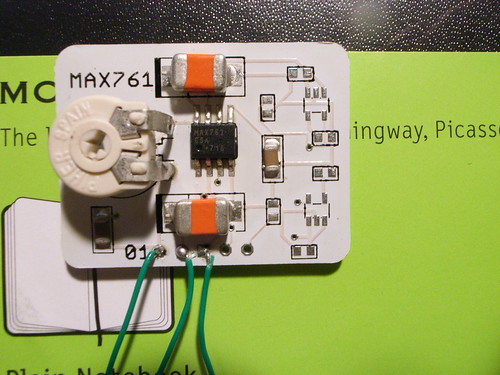
Mobile devices suffer from a variety of design requirements that have created some pretty interesting challenges. One is power. How do you get small, portable, powerful technologies to run for a reasonable amount of time without weighting them down with car battery-sized power cells? I’ve hit this problem in all kinds of ways. Flavonoid, for example, tries to do quite a lot, and wants to consume a relatively large bit of power while doing so. By slowing the clock down, I’ve managed to reduce the power consumed quite a bit, and today’s microcontrollers will run at pretty low voltages (3.3, 3, 1.8 volts) if you can sacrifice clock speed. But, if you need to do lots of stuff, you have to compromise carefully.
Ideally I’d like to find a middle ground — run at a sort of low voltage, keep some of the speed for the processor, and keep the whole package lightby using small battery cell.
This device here — the Maxim IC MAX761 — is a special pulse-width modulated step-up converter, which means it can take a voltage on one end and generate a higher voltage on the other end. It does so with a pretty decent efficiency (86%), with a low supply current (110uA), and you can get away with a smaller inductor because it runs the PWM at a high frequency (300kHz). Running at high frequency is key — as the duty cycle of the switching increases, the output voltage you’ll see increases, which, in this device, you can then control through a resistor network on the output. Well, it works — it’s possible to get more-or-less whatever voltage you’ll need, with some current restrictions, from this guy. I plan on using it to generate this weird 7 volts I need for a backlight for an even weirder miniature bit addressable LCD display.
This break-out board actually supports three output voltages — one is that which is generated by the MAX761, which is variable, using that ginormous potentiometer (which could just be a fixed resistor.) And then two other voltage lower than the generated output with a set of LDO regulators that would go there on those empty pads on the right (like the LP2985) — perhaps 3 and 5 with the MAX761 generating 7 volts.
But, I’ve been here before. I needed 5 volts and wanted that without having to use something like a 9 volt battery (so uncool, and really not much energy available in the usual alkaline cells), and without putting two 3.7 volt LiPo’s in series or something like that. In fact, I had hoped to use a simple and small coin cell. I came across the NCP1402, a micropower step-up converter that’ll give up to 200mA.

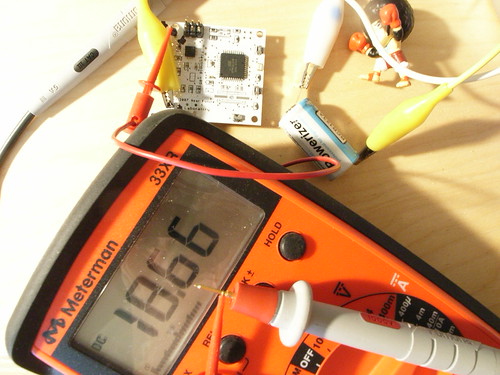
Here’s a project I did to better understand how to work some Jedi with power. The Torture Board. I made this break-out board to find a way to get 5 volts from a 3.5 volt or less battery. It’s mostly an exercise, really, for the time when one of my mobile projects will only work at 5 volts and using a 9 volt cell and a regulator is just bad and bulky and 9 volt cells are so old fashioned looking and boxy and expensive. I found this device, the NCP1402 that does the trick. Of course, I completely fracked up the schematic for testing it. I mean, I really screwed it up. Strangely, I sent off the board with a bad schematic, but the schematic in Eagle is fine — I must’ve fixed it in a haze, I guess, after sending it off. In any case, when the boards came back, I just sort of looked at them and shrugged and figured some day I’d wire it up. That day came, and it was a disaster. I hooked up a 3.7 volt LiPo cell and expected to see 5 volts on the output and be done with it. Instead, I found 12 volts! Yeek!
I reworked this one so much with hot air and an iron? It looked like a creme brulee when I was done.
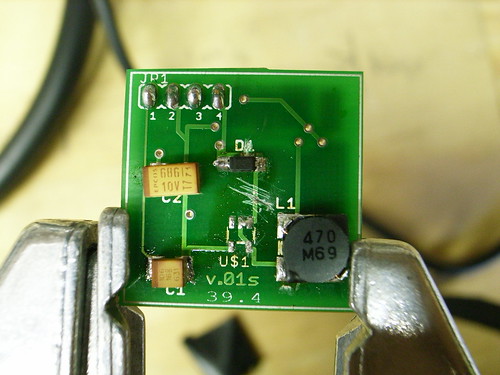
All kinds of problems. Look at that! The diode (middle) has a trace shorting it the hell out! And that trace between pins 1 and 2 and pin 5!? What’s that doing there? I must’ve been loaded when I sketched this schematic..look at that — Vout (1 & 2) connected to the wrong side of the diode!? C’mon..
Okay..lesson learned? Double, triple check my schematics. Also, that trace under the chip footprint? I couldn’t see that when I tried to repair the board with the components laid out, so I missed that problem. I spent probably two or three sessions of an hour or so each trying to figure out what was going on here. It’s confusing partly because of the one-way conductivity of the diode. With it in place, checking continuity can get confusing at times.
Here I started putting things right by cutting traces.
That trace between 1/2 and the right side of the diode, and the trace between 1/2 and 5 in the footprint of the NCP1402 needs to be cut..
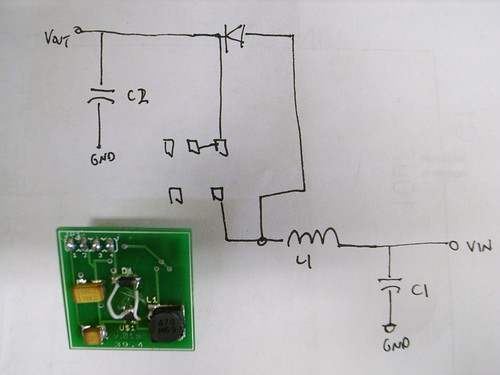
The right schematic.
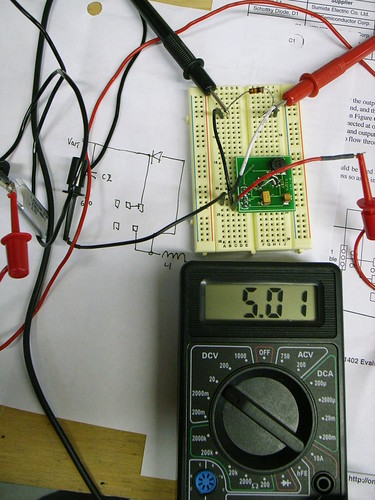
Finally..5 volts from a little 3.7 volt LiPo cell. I mean, this isn’t rocket science, or it shouldn’t be. I think I just sort of assumed that the boards are “right” even though I made designed them and never tested them. Something about something arriving as a manufactured little toast-point thing put me in the mind frame of, oh..finished component..this’ll work just fine. Sort of like getting a television from the store and, of course — it’s going to work, no problem.


